Showing posts with label camping. Show all posts

Wednesday, June 1, 2016

10 Tips for Camping with Kids - OneTigris

Going camping as a kid was the best thing ever. It was fun. It was easy. It filled my heart with joy. Going camping with kids can be magical too but it takes planning, patience, and a willingness to roll with whatever happens. Here are a few tips to make your next family camping adventure just a little more successful:

1. Put them to work – When you first get to your campsite, there’s a ton of work to do. It’s easy for kids to get bored while they wait for the tent to go up. But, even tiny kids can help with something, unloading the car, handing you tent pegs, or setting up camp chairs. It gives them something to do and gives them ownership over their own adventure. Chores that are torturous at home suddenly become fun when you’re camping. You know the phrase, “A spoon full of sugar helps the medicine go down?” A spoon full of dirt and campfire smoke helps turn everything into a game.


2. Put the screens away – My tent has an electrical outlet flap, a flap through which I can pass cords and cables to power all of my electronic devices. WHAT?! This is camping! With the allure of cell phones, tablets and gaming devices, it’s easy for “just one game” or “one last text message” to turn into a weekend you could have just as easily spent on your couch at home. If you’re in the woods to get away from it all, stay away from it all. Enjoy the wilderness, the family, the friends. Enjoy what’s real.

3. Marshmallows and hot chocolate – Some of the best things about camping are the treats. The memories associated with s’mores and trail mix are emotional. They are sugar-filled. They are magically delicious. Your kids will love planning, shopping for, and helping pack treats that they only get when you’re off the grid.


4. Tell stories – The screens are off. The fire is burning. You have a captive audience. Tell them about when you were little, about how you met their dad, about the greatest vacation of your life. They love these stories and the stories give them a sense of family identity. I recently heard renowned storyteller Donald Davis plead with parents to tell family stories to their kids. He said that kids will grow up whether we help them or not. They will get jobs, find spouses, obtain computers, get educations, whether we help them or not. However, if we don’t tell them our stories, they can never know them. We are the only ones who can tell them their history and the stories that made us who we are. He says there is only one rule to family storytelling – It doesn’t matter if they want to hear it or not.


5. Plastic Storage Containers – Organize the heck out of your camping gear. My favorite organization tip is to arrange all of your gear into kits that you keep at the ready. Keep the kits in plastic storage containers with a checklist of contents on the side. When you want to take a trip, just make sure each one is fully stocked and toss them in the back of the car. For example, the cooking kit contains matches, propane canisters, paper towels, hand sanitizer, sandwich baggies, trash bags, dishes and utensils, dish soap, peeler, knives, cutting board, towels, sponge, and a dish pan.

6. Cook food ahead of time – Whether you’re eating sandwiches, foil dinners, or scrambled eggs with potatoes and ham, prep and cook as much as you can in advance. Cook the meat most of the way and steam the rice or potatoes in your foil dinner. Cook your entire egg breakfast, put it in a Ziploc bag, and reheat it in a pan over your camp stove. Chop all your veggies in advance and slice the cheese for sandwiches. The more you prep ahead, the fewer dishes you’ll have to wash in the wilderness.

7. Let them carry their own hiking stuff – as you go for age-appropriate hikes, let the kids each carry their own backpacks with food, water and other supplies. This lightens your load and makes them feel like real campers. They love having the freedom to grab snacks when they feel like it and you will hear far fewer chants of “Mom. Mom. Mom. Can I have some beef jerky?”


8. Frisbees and balls and card games, oh my! – Stuff the gaps in between your duffles and sleeping bags with games and activities to do outside. Be creative. Late night Uno by the light of a Coleman lamp is an awesome outdoor activity.

9. Let there be light – Every person in the family should have their own flashlight. This seems obvious, but nearly every trip we get to the campground and realize we don’t have appropriate lights for each person, lights with working batteries, lights bright enough to light our way but dim enough that the 4-year-old won’t use hers to burn her siblings’ eyes out of their sockets.

10. Potty time – My best piece of advice for camping with kids is to save the nighttime potty break until the last possible second. I have had trips in which my kids used the restroom no fewer than five times in the night. This was unusual and aggravated by the fact that we were camped about seven inches from a very loudly bubbling stream. And it was uber lame. I’ve had the fewest nighttime biffy runs when I did the entire bedtime routine and then took them in their pajamas to the bathroom, walked them directly back to the tent, and dumped them into their sleeping bags.
More info: 10 Tips for Camping with Kids

Saturday, May 28, 2016

Why You Need a Shemagh in your Preparedness Gear

What is a “Shemagh“? Wikipedia tells us: A Shemagh, also known as a Keffiyeh, ghutrah, ḥaṭṭah, mashadah, chafiye, Sudra and cemedanî, is a traditional Middle Eastern headdress fashioned from a square, usually cotton, scarf. It is typically worn by Arab men, as well as some Kurds and Jews. For decades, keffiyeh have been issued to British soldiers who now, almost exclusively, refer to them as shemaghs. Their use by some units and formations of the military and police forces of the former British Empire and subsequent Commonwealth dates back to before the Second World War. Shemaghs are currently worn by special forces worldwide. The Shemagh is essentially a big bandana, usually a square measuring 42 or 44 inches on each side. They come in many colors. I personally have them in green, khaki and white, which should cover all seasons (for some quick head camouflage). What can you use a Shemagh, or a regular bandana for? Almost anything. I keep one in each of my family vehicles, camping kits and even carry one daily in my backpack for work.I can’t tell you the number of times I’ve been caught, unexpectedly, outside in the sun, for long periods of time. This can be a life saver, even more so, for us fair skinned folk.
desert head scarf
head scarf
Some Shemagh uses:
01.Sun Protection for bald heads… or necks, for those of you with hair!
02.Cooling (soak with water and drape or tie it to your person)
03.Sweat Band
04.Dust Mask Face covering (conceal your identity, like a ninja)
05.Diffuse Light (put over flashlight or battery lantern)
06.Water pre-filter (remove sediment that could clog your water filter)
07.Water acquisition – Tie around ankles and walk through plants covered with dew. Wring into water container (or mouth)
08.Signaling flag
09.Trail marker
10.Tie to luggage or bag to make it identifiable
11.Hot pad or pot holder (metal or other cookware gets hot when you use it with fire)
12.Food cover (keep bugs off your food)
13.Tourniquet
14.Arm Sling
15.Use to secure a splint in place
16.Eye covering or eye patch
17.Scarf or Neck Warmer
18.Napkin
19.Washcloth
20.Towel
21.Dishtowel
22.Handkerchief (you may have a runny nose or sneezing)
23.bag for food collection or to help carry items Tie around sticks or branches to make a bundle (easier to carry)
24.Knife Wipe Cloth
25.Gun Wipe cloth or tear it up to make gun cleaning patches
26.windsock (check wind direction)
27.Tie down loose gear (on vehicles, belt or backpack)
28.use it to replace a busted backpack shoulder strap
29.belt
30.Hobo pack (pouch on end of a stick)
31.improvised diaper
32.improvised toilet paper (yuck)
33.Blindfold (I’m not even going to ask….)
34.Bullfighting cape (joking…or am I?) “Olé!”
The list of uses, for a shemagh, or a good bandana,  could go on and on, and would only be limited by your imagination. This list is just a sampling of, why you need a shemagh in your preparedness gear!
Copyright © GeekPrepper.org

Wednesday, September 16, 2015

How To Attach Gear Using the MOLLE System

How To Attach Gear Using the MOLLE System

OneTigris Tactical ID Card Holder


OneTigris Tactical ID Card Holder

  • DOUBLE SIDE (CAN BE USED ALONE) : One for badge holder with transparent plastic film; one for Credit Card Organizer with hard mesh (Micro-mesh card holders x 3, fit 2 credit cards each)
  • PEN HOLDER: Elastic pen loop holds pens during conferences, etc. It may too big for a pencil, but work well for normally pen and marker
  • MOLLE SYSTEM: 1" velcro belt-strap also fits MOLLE standard. At the same time, it can keep the credit cards from slipped off
  • INCLUDED: matte black split ring for keys, lanyard, carabiners
  • Size:5.1" L x 3.3" W (13 x 8.5 cm)

When I go hiking, camping, or possibly traveling around the country or world I prefer having my valuables around my neck and tucked into my shirt or jacket. It's better than having a bulky square wallet in one of your pants pockets. Anyone who hikes knows that when you take large steps going up hill or climbing onto a rock anything large in your pockets presses hard against your legs and restricts movement.

 With this neck lanyard you eliminate that problem. If you tuck your shirt in as well, even if the lanyard breaks your belongings will just fall into your shirt. LASTLY, the Velcro strip holds all your cards in the holster so they cannot fall out or get snagged and pulled out.
Material: Nylon

Monday, September 14, 2015

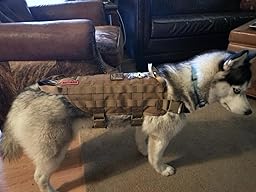
OneTigris Dog Vest Harness

Made of soft tricot mesh fabric, good air permeability, make your dog very cool in summer Velcro panel down the back for adding unique patch Soft pad insert on the collar to make your dog comfortable MOLLE webbing for attachement of any MOLLE or MALICE-type pouches 5 size available to fit different dog Great for summer, make your dog cool. The harness has two handles on the back and front for attaching leash, but in order to avoid unnecessary break when use too much strength in special situations, it's still better to use dog collar to guide him/her. OneTigris Sportswear Dog Sizing Chart (Size/Inch) XS Chest Girth:14-20, Neck:8.5-11.8, Back Length:11, Width:10 S Chest Girth:15-21.5, Neck:9.2-12, Back Length:13, Width:11.2 M Chest Girth:16.5-27.5, Neck:11.5-15, Back Length:16, Width:13 L Chest Girth:18.5-36.5, Neck:14-18, Back Length:19 ,Width:14.9 XL Chest Girth:20.5-40.3, Neck:10.5-21.5, Back Length:21, Width:16.5 Customer reviews on OneTigris Dog Vest Harness Kenneth Shockley Just arrived in the mail today. I have been searching for a service dog vest for months and think I finally found one that is relatively inexpensive and will work great from my needs. I like the military style as I am a disable Marine. I have a 95lb large German Shepherd and I purchased the XL because the sizes weren’t clearly marked. I was worried about the length of the straps to go around his belly from looking at the sizes on the other brands. I read all of the reviews on this and saw that people buying the XL had 100lbs dogs, Thus why I chose the largest size available. After I got this in the mail, I found that the straps would fit around my dog twice. They gave plenty of length for a dog twice the size of mine. At this point I wish I had purchased the large and not xl because the length is just a tad too long on his back. It only took me minutes to adjust for the proper fit and we did a nice lap around the yard to see the comfort. He wore it for about 4 hours right out of the box without any signs of discomfort or disliking it. I live in the desert and it can reach temps of 120 in the summer and dont think I have to worry about him wearing this in the summer for long periods of time. it seems to breathe fine. Todays temps were in the high 70’s. From first reviews, it appears it will be a great investment of my $45 and my dog seems pretty happy also. I have added a few photos so you can get a better feel for what it looks like on the dog, the length, and materials. I have had this vest and used it daily for about 6 months now. I still use this daily and it is my preferred vest of choice for my dog. Only big concern is that the threading on the sides that holds the Velcro and the loops together is coming unraveled. I did hook a small 6 inch bag to the side of the vest and it was ripped off the first time my dog walked too close to the fence. The loop stitching came unraveled and the bag fell off. I have had to fix this by taking super glue on the back side and covering the stitching so the threading doesnt come loose. You cant tell that I modified the vest in any way, but it was still a pain that I needed to do this. Now I have a 3 inch hole in the velcro where the stitching came loose. I will need to go back and put some glue under the velcro to make it stay. If I dont the entire top velcro patch running across the top will eventually fall off. For the money I would buy again, with the understanding that I need to modify it right off the bat to make it more sturdy and last longer. I always figured that the buckles would be the part that fall apart or break first, but it has held wonderfully. I have lifted my dog off the ground many times and held him back from being aggressive without problems. considering the cost of a real vest, I would buy this again and just apply some super glue for $3 to keep the vest in good condition for a few years. Video Reviews on OneTigris Dog Vest Harness

Tuesday, August 18, 2015

OneTigris Upgraded Version Waist Pack Tactical 3 Ways Modular Deployment Compact Utility Carry Bag MOLLE Case Heavy Duty with Shoulder Strap

OneTigris Upgraded Version Waist Pack Tactical 3 Ways Modular Deployment Compact Utility Carry Bag MOLLE Case Heavy Duty with Shoulder Strap


Made of High-density Oxford fabric, light weight and durable
Upgraded version of the smaller one in our store
3 ways design, can be used as shoulder bag, waist pouch or handbag
Molle system pouchs can be attached freely
The main compartment 9x9x3.5 inch, a little extend to hold an iPad. One top and one front compartments. Two side pockets, each sized 7.5x2.75x1.5 inch. Many inner pockets
Product Description:
Your using experience is the first concern of OneTigris. For this pack, we receive most good feedback for its cool design and structural utility. We still working on upgrading for its durable and user-friendly. We appreciate you so much, all friend-like buyers.


Customer Reviews on OneTigris Upgraded Version Waist Pack Tactical 3 Ways Modular Deployment Compact Utility Carry Bag MOLLE Case Heavy Duty with Shoulder Strap

I ordered this bag along with another one from ebay. Both same type of bag just a difference in size. I was extremely disappointed when seller of this bag contacted me saying bag would take, what I considered to be an extended amount of time to get to me. I tried canceling but it had already shipped. Rick, their representative was extremely nice on his email and said I would be very pleased with the quality of the bag and that it was worth the wait. I would be very happy once I saw it. He was so genuine I couldn't even get mad. In the meantime the Ebay bag arrived and I immediately did not like. The quality was horrible and it was HUGE. Right away I started the return process. Then the bag arrived from One Tigris. I can honestly say I opened it, took a peak, literally and closed it back up. Wrote the email to return it. Rick responded very apologetic, showed immense empathy and asked if I would please ship to another customer in California since shipping back to China was not a good option and he would pay for the shipping. I couldn't even believe he said that! I thought, wow what service. I must admit, at this point I hadn't even realized they were in China. So I said I would and asked him to send the customers information. The next day he not only sent me the customers information but along with that he had already processed my refund! He had not included the shipping but said as soon as I had a figure he would reimburse me. Now, I got to be honest here.. I was blown away by this gesture. Here's the funny thing that happened next. Since I had opened the bag, I wanted to repack it the same way I had received it. So I took the bag out and truly looked at it. Well...I fell in love. This bag is everything and then some. The picture does not do it justice. The quality is unreal. Far superior than any other bag of its kind. Sooooo now I wanted to keep it! lol. I sent Rick an email asking if he could rebill me and if it wasn't too much of an inconvenience with his other customer. His response once again blew me away! He said he was very glad I had changed my mind but he was waiting for the other person to verify it was ok to wait before he would commit to letting me keep it!!! I could not believe how considerate this guy was! Talk about service. In the end it all worked out since I did receive and email from their team leader and he let me know that the customer could wait and in turn they had cancelled the refund and I could keep the bag. I've shared this lengthy story to let anyone who's looking at this bag know: ORDER IT WITH CONFIDENCE. BAG IS GREAT! But SELLER IS BETTER! I'll be buying more from them!


Tuesday, July 21, 2015

OneTigris SNIPER Tactical EDC Water Bottle Pouch


OneTigris SNIPER Tactical EDC Water Bottle Pouch Description

  • Just the right size for most 32oz Water Bottles. Nalgene Bottle fits great.Main compartment is 9.8" x 4" diameter.
  • 6.3"x 3.9" Front pouch is perfect for coffee, tea, first aid, cell phone, and more
  • Heavy duty MOLLE straps on back of pouch allow it to attach to other gear with PALS webbing or be worn on a belt.
  • Velcro on front and on top to add your favorite moralle patch. Smooth operating, snag-free, oversized zippers with paracord pull.
  • Ideal for hunting, hiking, camping, fishing, riding or travel.

Customer reviews on OneTigris SNIPER Tactical EDC Water Bottle Pouch:

"
I had two of these, now I have 3. I selected this the one tigris water bottle holder the first time because it was one of the few that included a shoulder strap. This is a great water bottle holder. It is large enough to hold a tall insulated thermos water bottle (16 inches) and still comfortably close. What I really love is the versatility for carrying. There's the molle straps on the back so it can attach to any molle system or simply to your belt. Because of the molley webbing, if you attach it to your belt, you can do so at various heights. It also has a rather robust metal clip on the back which can be used to hang from a belt loop or attach to something else. The included nylon should strap is handy too, I use that if I'm giving it to one of the little ones that doesn't have a belt.

I've attached one of these to the side molle webbing on a backpack, which lets me access the water bottle without taking the pack off by comfortably reaching to my side. Because the holder is deep, I usually don't bother to zip the top closed...there's little danger of the water bottle falling out. I've attached another to the side of my laptop case using the molle straps. This is great at the airport. After going through security I can buy and drop a water bottle in there and free up one of my hands. It's also not bad for carrying a beer/soda can around at a fair on your belt to keep your hands free. Because its so tall, I've walked around with an open can in there without spilling any, though it does have a small grommeted hole in the bottom to let liquid out if it were to spill.

The pouch on the front is handy when I give this to one of my kids. They can put money or a small wallet in there to carry their cash. On a bike ride, it also fits a compact first-aid kit well. I also got some molle clips from one tigris. They fit nicely on these and add some additional versatility for attaching non-molle items to the front molle webbing.
So far, these things have held up really well. When the kids got them muddy I even ran them through the washing machine."

OneTigris SNIPER Tactical EDC Water Bottle Pouch Youtube video review


Buy OneTigris SNIPER Tactical EDC Water Bottle Pouch: http://amzn.to/1C860gA


Tuesday, July 7, 2015

OneTigris Tactical Dog Training Molle Vest Harness

OneTigris Tactical Dog Training Molle Vest Harness Specification:
  • MOLLE on both side of the harness for use of any MOLLE or MALICE-type pouches, attached with magazine pouches, water bottles, food snacks, etc
  • Velcro panel down the back for any patch furniture
  • Grid design lining for breathability. Soft pad insert on the collar to prevent chafing on your dog's neck
  • Two carry handles are attached to both the front and back of the harness and has two attachment points for a leash
  • 5 Size available, fit dog's Shoulder to back leg lengths 28.5cm to 54cm
Customer review on OneTigris Tactical Dog Training Molle Vest Harness
Does your wife make you walk a dog that is the size of a glorified hamster? Does your dog constantly get picked on and beat up at the dog park? Or is your dog a 150 pound wolf you rescued as a pup from the wild after fighting off hordes of lawless poachers? Whatever dog you own, look no further for an absolute necessity to your K9's load-out!

What you are looking at here is an excellent deal on a Tactical dog vest to make your K9 partner just as awesome as you are for searching out tactical gear. Whether your K9 partner is a professional bomb sniffing dog or you just want your dog to be "da bomb" at the local dog park, then this vest is for you! Not only do you have a wide selection of colors to blend with environment and coat patterns, you have a plethora of sizing options to fit the smallest or breeds up to the largest of wolf-hybrids out there! Make sure to measure your dog well though, as I bought a size medium for my 38 pound lion-taming wolf thinking it would be a bit large, and it ended up fitting perfect. Buyer beware though, this vest has the ability to turn even the daintiest of teacup poodles into combat ready, pitbull-killing, wolfpack of one because the world cannot handle two, best K9 partner you ever had! If you think you can handle that, then read on. Otherwise, turn back now and resume searching out Martha Stewart dog costumes.

Now lets talk about construction. Is it made in America? Sadly no. Was it forged in Middle Earth deep in the fires of Mount Doom? Maybe... That is just how tough this puppy is (no pun intended). The chassis starts on a heavy duty nylon with a breathable mesh sewn underneath to keep your K9 cool when combat gets heated. Next you have PALS (Pouch Attachment Ladder System) sewn down the entire length of both sides. This gives you the ability to load down your beast with all sorts of necessities such as water pouches, spare magazines for your primary and secondary weapons, kibble for those overnight missions, hand grenades, med-kits, short wave radio, K9 cam to give HQ a visual of your AO, and so much more! Heck, you could probably attach a turret mounted UZI and have your trained squirrel ride your beast into battle! Next, on the middle of the vest are two heavy duty nylon grab handles, both forward and aft, for a handler to easily maneuver even the biggest of K9 breeds. Sewn in next to each of those grab handles are two hooks for leashing your beast in order to prevent any collateral damage when civilians are present. To finish off this awesome harness you have a wide heavy duty Velcro strip running the entire length of the vest to attach whatever patch furniture your little heart desires.

If you're still not convinced, think of it this way: If Rambo had a dog, his dog would have this vest!


Buy OneTigris Tactical Dog Training Molle Vest Harness: http://www.amazon.com/OneTigris-Tactical-Training-Molle-Harness/dp/B00PZWDMX0/


Video reviews for OneTigris Tactical Dog Training Molle Vest Harness


Tuesday, June 2, 2015

Camp Fire vs. Survival Fire vs. Cooking Fire

20140915_033056
Over the years I have seen a great deal of confusion between a camp fire, cooking fire and a survival fire. Main Stream Survival Media (Survival TV Shows) have shown us camp fires and cooking fires and portrayed them as fires fit to be survival fires. Another major discrepancy I see on these shows is the amount of firewood gathered/collected to last an entire night. I always seem to calculate how long their wood pile will last in my head and I can never reach more than an hour or two of substantial fire. I have been a long time…
Survival Fire/Long Fire:
20140915_033056
Notice the length of an survival fire is at a minimum the length of your head to waist to ensure core body warmth and this fire should never be allowed to die down to just coals but should have at least 1′ flames to ensure your warmth through even the coldest night. Ideally a survival fire should be the entire length of your body to ensure maximum warmth (if it were the dead of winter I would make the same fire full length of my body and have flames roughly the height of the shelter). Notice that pile of wood to the rear of the fire, that amount of wood is more than I have ever seen on any survival show and that was just one of my three piles of wood to get me from 3am until daylight. I had a larger pile just out of frame opposite of shelter to act as a quasi wind break if needed and one by my body to be within arms reach so I could easily fuel the fire throughout the night. Quick tip for survival fires to increase your warmth throughout the night: assuming you are laying directly on the ground or on a pine limb bed you can start your fire initially where your bed will be located as you gather firewood for the night. Then you cover the coal bed with a small layer of dirt (1-2″) which will heat you from below as you get reflective heat from your shelter (in survival every advantage counts!). 

Cooking Fires:

20140725_212642
1) There are several varieties of cooking fires and the one pictured above is one I use for boiling, remember boil over flame, cook over coals. The flame should nearly engulf the pot to ensure a quick boil, this fire would then be reduced to a very low flame that does not reach the bottom of the pot or merely a coal base to continue to cook soup after boiling. Firewood needed: mix of hard and soft wood to get a strong fire base going and enough to keep a strong flame for a minimum of 15 minutes (normal boil time for an 8 qt. pot).
20140725_214839
2) Strong coal base (hardwoods burnt down) on the sides of the fire with a low and slow flame in the center (using dense hardwoods). This is my multipurpose cooking fire in which I use the center of the fire to slow cook soups (great for venison chilli) and the exterior coal base to cook breads or anything that requires slow cooking. Firewood needed: softwoods to get the fire going and 4-6 arm sized logs to build a strong coal base  and an additional two logs and a few smaller sticks (finger sized) to keep flame in the center if needed.
3) The Dakota Fire Pit/Hole: This cooking fire is extremely effective when you only have a very limited amount of firewood to deal with. With this fire one can easily cook an entire meal with on wrist sized stick that is roughly 6′ long. A true one stick fire, to utilize the bark for a birds nest for fire starting, batoned sticks down to finger sized sticks and feed as needed to fuel your fire. This is a very efficient fire so don’t allow the flame above the level of the ground to allow for the best cooking environment possible.
20140426_205917
4) Swedish Torch: See My Review of this Fire Method Here (LINK). As some of you may know I’m not a huge fan of this method with out a chain saw and I don’t carry a chain saw with me into the woods so this method of cooking is rarely used by me. It is fairly effective once you get the fire going and is a sort of upside down fire that seems to work best for larger bush pots (after about 30 minutes anything bottle sized will simply tip over as there isn’t enough support for such a small surface area). I personally chalk it up to a campground or base camp fire where you want to impress someone with a camp trick, but hundreds of people love this method, I guess I’m just a little too attached to my tripod cooking method when in the woods.

Camp Fire:

20140704_223038
This is what I see the most of on survival TV shows a mid-sized fire with little to no reserve wood to continue the fire once the base burns down. This is the type of fire that you roast a marshmallow over or cook a hot dog on yet at the same time this fire can easily evolve into a long fire or into a cooking fire once a coal bed is established.  This fire basically consists of softwood and hard wood mixed together (think tepee of softwood with a log cabin of hard woods around it or an upside down fire) and is usually a fire lay that is roughly knee height. Reserve fire wood for this type of fire would be minimal hard wood to help extend the fire an hour or two in case conversations abound.

Today’s survival media has provided us with a misguided sense of what a survival fire is and what it takes to maintain one. In all of the “survival” TV show’s I have watched I have yet to see anyone truly explain a long fire/survival fire or the fire requirement of this type of fire without the ability to cut substantial fire wood (i.e. no available ave or substantial belt knife). So I thought I would create this post to right the wrongs I believe have been done to those who unfortunately learn from survival TV. So please remember a survival fire is a big fire that is at least as long as your torso and you can never have enough fire wood. Once you have a pile of sticks you pick up off the ground that is to your waist take a breath and then realize you need at least one or two more piles that size to make it through the night warm! So survival fire rules to live by: 1) big fire=survival fire; 2) you never have enough fire wood; 3) if you can cheat in a survival situation do it, Mother nature never fights fair! (i.e. hot coals buried under your bed); 4) If you can make a more substantial shelter to control your core temperature better by all means take that advantage.

OneTigris Waist Pack - Surprisingly awesome!

Hey EDC-ers! Long time lurker, first time poster. I'm excited to join this amazing community.

So I just purchased a OneTigris waist pack, essentially a Maxped Proteus clone. I was a little wary, considering I know nothing of the company, and it was coming from China, but I could not be happier with my choice.

[IMG]

I was looking for a waist pack that could be worn multiple ways (waist, shoulder, MOLLE), that could fit what I needed on a daily basis for work and play in as small a package as possible. I was looking seriously at the Proteus, but the price tag kept me at bay. The OneTigris then came across my path, and I figured "Hey...if it sucks, I'm only out 30 bucks". When I got the back in and packed it, all I could say was "HOLY CRAP!!" This sucker can pack it in!

The stitching looks well done, and it feels solid. The 1000d nylon feels sturdy and hearty, like it'll last a good long while. I can't speak to the strength in the field/bush, but for my purposes (work, around town), it'll do just fine. The zippers, while they don't say YKK, feel as such. They glide smoothly along the teeth. It'll take some breaking in to get the shape of the pack just right, but overall I'm impressed by the quality.

[IMG]

The load out I can fit in this thing is ridiculous compared to my expectations.
(certain items removed as I'm at work and currently using them)

[IMG]

Main pocket: iPad Mini in Apple Smart Case, PS Vita in a thin pouch, Moleskine large Volant, Moleskine small journal, checkbook, Word notebook, Kindle, Oakley Bullet eyeglass case.

[IMG]

Front pouch: Anker Astro e5 external battery, lightning cable, micro USB cable, pens, Smith & Wesson pocket knife, mini screwdriver with bits, USB charging block (and still room for more).

Side pockets can fit plenty (i.e. large vape box mod with tank attached, iPhone 6 in slim case). Not as much MOLLE attachments on this as I would have liked, but again...I wanted small. I'll be ordering the bigger size (Sabercat clone) for my pouches to attach. The weight is very minimal, feels very comfortable on the hip loaded out (although I use the carry handle more).

[IMG]

All in all, I can only recommend this pack to anyone looking for a solid waist pack for EDC, but doesn't want to jump in with both feet in the pricey Maxped pool. Honestly the biggest deciding factor for me was the excellent attention paid to customer service. I posted a question on the OneTigris Facebook page, and within minutes had one of the heads of the company friend me and send me a message. He continued to speak with me over a few days, answering any questions I had prior to purchase. Post purchase he continued to thank me for my business, and thanked me for the review I left on the Amazon page. Apparently once a month they choose 2 reviews as the best, and completely refund the price of the purchase. To me, that beats out any other company and they have my business for life.

I get the sense they are a young company, and are still working on products and designs. I'm excited to see what they produce in the future!

More from: http://edcforums.com/threads/onetigris-waist-pack-surprisingly-awesome.128804/ 

Monday, June 1, 2015

MAKE A PLASTIC BOTTLE FISHING TRAP

MAKE A PLASTIC BOTTLE FISHING TRAP

In a survival situation, every little bit of food you can procure adds to your chances of staying alive. If you’re in an area with fish, one of these small pop bottle funnel traps can be a great way to catch small minnows for either bait, or food if conditions are really bad.
I’ve been using these types of minnow traps for as long as I can remember. They are a great way to catch bait, and are supper simple to make. They’re also pretty much free, and a great way to recycle those old water bottles.
plasticbottleinstructions

HOW TO MAKE THE PLASTIC BOTTLE FISH TRAP

  • With a Sharp Knife, carefully cut off the top of the pop bottle (as shown above). You can use pretty much any kind of plastic water bottle to make this type of trap.
  • Shove the head or cone of the bottle into the body of the bottle. To further secure the head, you can poke a couple holes through the cone and use a bit of fishing line to tie the sections together.
  • Throw in a couple small rocks to anchor the bottle to the bottom, poke a couple small holes in the bottle, and then add some small scraps of bait or small insects to attract the fish.
  • Place the bottle in some shallow water, and secure it with some line. Once the fish swim through the funnel, they will not be able to swim back out.
  • The more of these you can set, the better chances you have of catching something substantial enough to sustain you.

 EXAMPLES OF PLASTIC BOTTLE FISHING TRAPS


plasticbottlefishtrap
fishtrap

Sunday, May 31, 2015

HOW TO USE A FIRESTEEL

Ferrocerium Rods have earned quite a top level place in outdoor ventures. They bring nothing but advantages when carried and used in combination with natural materials for firelighting. They are very small, last for thousands of strikes and they produce very hot sparks at temperatures around 3,000 °F, which is clearly a great advantage no matter what the tinder. Despite how versatile and reliable these tools are they do require good technique and an understanding of the natural tinders your using. Identifying and preparation of natural materials to use with your Ferrocerium Rods is required always.
Some key things to know
Other names for a Ferrocerium Rod is Firesteel, Ferro Rod and Metal Match.
Ferrocerium is a combination of metals that have pyrophoric property’s. This means that they spontaneously ignite in trace amounts when exposed to oxygen or even moisture. Scraping the rod creates heat from friction and releases small fragments of metal which burst into flames at an incredibly high temperature. Its important to note that Ferrocerium Rods come in different composites, Iron Oxide levels can differ and a lower amount will give characteristics of being soft and brittle while a higher Iron Oxide level with harden the Ferrocerium Rod more.
You will find that Ferrocerium Rods will behave differently depending on the hardness. Softer ones will require less pressure and speed to create fragments and sparks but will wear out quicker. harder Ferrocerium Rods will require a little more pressure to get those bigger chunks off for long burn times. Also if you scrape them slowly they often do not produce sparks which can bring its advantages allowing you to create a pile of dust prior to setting the whole thing on fire with the final strike! This is good for stubborn tinders or lighting candles.
Personally I prefer a softer Ferrocerium Rod as more control can be applied.

IMG_0197
Some come attached to a large block of magnesium designed to be scraped and used with the Ferro Rod. I would avoid these as your better off with a larger Ferro Rod and no magnesium block.
A good one to buy commercially is the ‘Light My Fire Army 2.0‘ Ferro Rod as it has a good metal composite and will produce good sparks. It also comes with a small striker that has a good bevel on it so it will bite in and scrape away enough material. This particular Rod is of a softer composite and many techniques can be applied to it giving excellent control.
Ferro Rods normally come with a black coating so scrape some of it away till you see the metal underneath before using it. The scraper that you use will ultimately affect how it performs. If you scrape the rod with a smooth object nothing will happen because you’re not scraping away any of the material. Most Ferro Rod’s come with a small scraper and they will generally have a 90 degree sharp angle on them or a lip which will allow you to drag them at a 45 degree angle cutting into the rod creating friction and release a shower of sparks. If the spine of your knife has a sharp 90 degree angle on it you can use it to scrape the rod also.
The more you use a Ferro Rod and the more you practice with various materials the easier it will all become, many strikes become one or two before you have success. Once you start using them it wont be long before your buying Blank Rods from eBay and mounting them in antler, bone or wood to make your own.

Wednesday, May 27, 2015

OneTigris 34L Moudular Fast Tactical Assault Backpack DayPack for EDC Camping Hiking Traveling


OneTigris 34L Moudular Fast Tactical Assault Backpack DayPack for EDC Camping Hiking Traveling Specification:
  • The pack offers a great amount of carrying space and is perfect for military as well as camping and hiking
  • The modular molle system throughout the bag and shoulder strap to add on additional pouches & other tactical gear
  • Made with adjustable padded straps, waist belt and padded back for max comfort
  • Side pockets for quick access; have a partition for the water bag; external side compression straps
  • Overall Size: 11.8in * 7.9in * 19.7in. Approx 34L (Only the backpack is included)


OneTigris 34L Moudular Fast Tactical Assault Backpack DayPack for EDC Camping Hiking Traveling YouTube


Buy OneTigris 34L Moudular Fast Tactical Assault Backpack DayPack for EDC Camping Hiking Traveling  http://amzn.to/1RjeVPC

Thursday, May 21, 2015

7 SURVIVAL TIPS LEARNED FROM THE WALKING DEAD

7 SURVIVAL TIPS LEARNED FROM THE WALKING DEAD

the-walking-dead-season-5-date-710x400-can-you-spot-the-difference-between-the-walking-dead-season-5b-postersThe Walking Dead is one of the most popular post-apocalyptic shows ever seen on television, and while the gripping story focuses on the characters and their travels through the ruined world, there are some lessons to be learned by us along the way.
Sure, not everything the characters do is spot-on correct for survival, and honestly much of what they do is the opposite of what you should do in a survival situation, but even bad actions can be learned from, just never repeated. We’ve rounded up seven lessons to be learned for survival from watching the Walking Dead and listed them below. The show does a great job at showing us what average people will do in an EOTWAWKI situation, and thanks to their many mistakes, we can learn and be better.


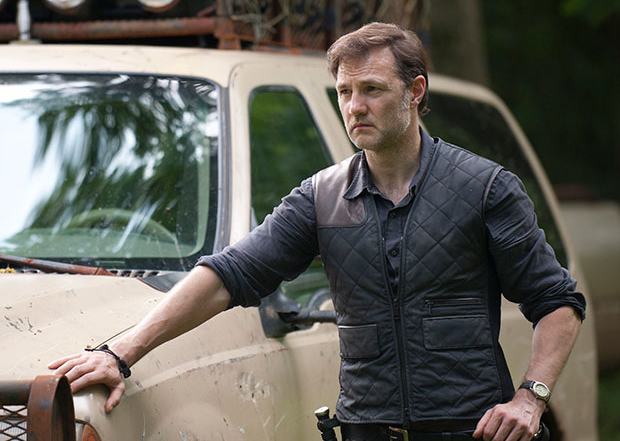
The_Governor_ep_3
1. BEWARE OF OTHER SURVIVORS, NO MATTER HOW NICE THEY SEEM

If there’s one thing this show has taught us, it’s that you need to be just as scared of your fellow survivors as you are the enemy. While someone might seem nice, they could easily be playing you for a chump so they can steal your supplies or just so they can do you harm.
The Governor seemed like a really nice guy and we saw how that turned out. The same goes for countless others in the show that lead people on just to take advantage of them later. Don’t even get us started on the “people” at Terminus. Remember, if it looks too good to be true, it probably is.

2. A SECURE LOCATION IS GREAT, BUT NEVER PERFECT

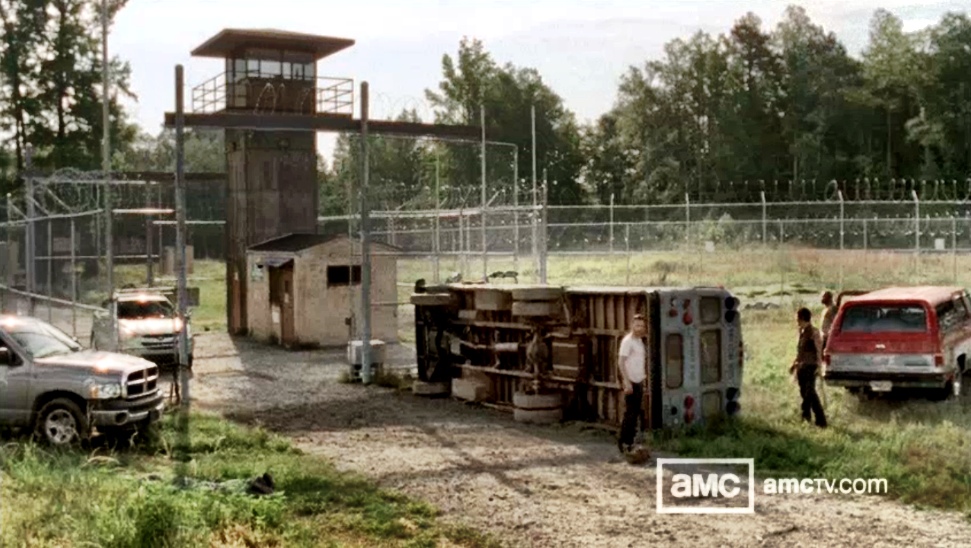
photo
This is best shown with the example of the jail in seasons 3 and 4, but can be applied to just about any refuge taken in the show. It doesn’t matter how secure you think your location is, something can always happen to make you have to bug out.
Keep your eyes open and no matter how safe you feel, always have a plan to get out quickly and to meet up after you bug out. As we saw in season 4 when the survivors were pushed from the prison, not having a plan to meet up after an emergency can leave your fellow survivors scattered to the wind and in constant danger.

3. SOMEONE ALWAYS HAS A BIGGER GUN

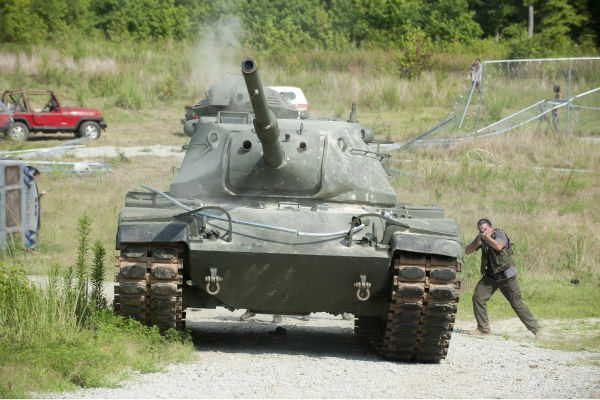
d7811fb0-e47b-1d96-fc5d-f86ce6e88816_TWD_408_GP_0802_0302
It doesn’t matter how big your gun is, or how many guns you have, there will always be someone out there with something bigger. Don’t rely on the size of your guns or the amount of ammo you have to protect yourself.
Learn how to survive and make sure you have other methods of defending your camp that aren’t guns. If you think you’ll be safe because you have the biggest guns, you’re destined to fall. Just look at The Governor and his tank for a great example.

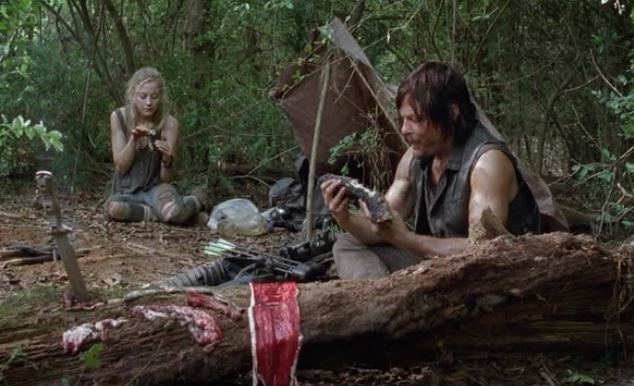
4. BASIC SURVIVAL SKILLS WILL SAVE YOUR LIFE

Daryl-and-Beth-Walking-Dead-4
When it’s all said and done, at the end of the day it’s basic survival skills that will keep you alive. All the guns and gadgets in the world won’t replace the basic skills like building a fire, tracking prey, and building snares. At the core of most episodes is the innate skills of the survivors.
Finding water, catching dinner, and setting up a safe camp are all core necessities to keep the survivors in the Walking Dead alive. Without these, they’d be zombie bait pretty quickly.

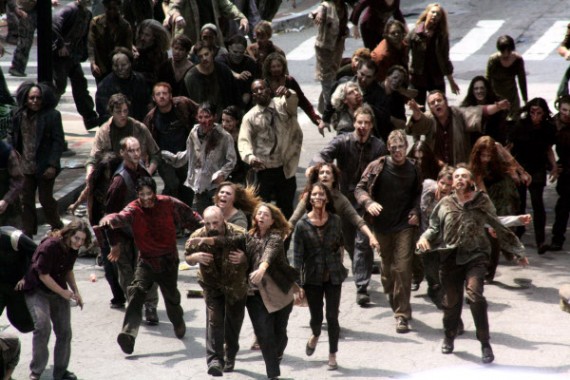
5. “ZOMBIES” ARE EVERYWHERE

walking-dead-set1-570x380
While the chances or real zombies being everywhere is pretty low, in a survival situation you’ll have to deal with a different sort of walking dead. While you might be prepared for most of what the world might throw at you when the SHTF, most people out there won’t have the slightest bit of preparation ready.
These people could be considered zombies, since they will be wondering around, ready to pounce on anyone who is prepared and take what they want. While you probably won’t find one that wants to munch on your brains, most of these real-life zombies will want to take everything you have.

6. LEARN WEAPONS OTHER THAN GUNS

Walking-dead-michonne_510
Guns are pretty useful tools. While you’d rather not think about having to use one against another person, especially when a major disaster may have wiped many people out already, sometimes it’s a necessary evil. If things have gotten so bad that there isn’t any real law enforcement, your gun might be the only thing standing between survival and death.
This doesn’t mean it will be useful forever. Ammo manufacturers are not likely to be pumping out rounds to buy at your local gun shop in a major survival situation, and finding a gunsmith to fix a majorly broken firearm will be nearly impossible.
Learn how to use and fight with weapons that aren’t guns. This includes knives, bows, and heck, even a samurai sword if that’s your thing. Don’t just carry these, learn how to use them and use them well. You’ll be glad you did when things go bad.

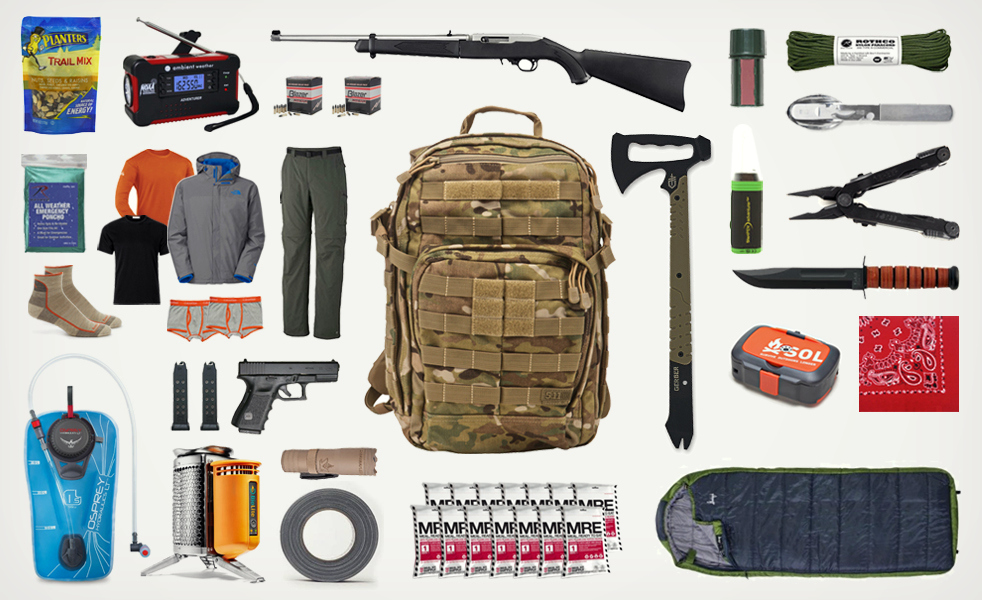
7. ALWAYS HAVE YOUR BUG OUT BAG READY

bugout-bag-cover
The last tip is very much a summary of all the tips above. The basic idea here is that you never know when things will go bad. It doesn’t matter if you’re behind walls of wire and cement, it doesn’t matter if you have a cache of rifles and handguns, and it doesn’t matter if you have the best-trained group out there. Things can go bad quickly and easily get away from you.
Always keep your bug out bag handy with all the supplies you need to get out of dodge quickly. Whether it’s a tank rolling over the fences surrounding your compound, or some “zombies” overtaking your camp, being able to pick up and run at a moment’s notice is vital to your survival. Keep this in mind and you’ll be far more likely to escape the hordes and make it to another season.