Monday, June 1, 2015

MAKE A PLASTIC BOTTLE FISHING TRAP

MAKE A PLASTIC BOTTLE FISHING TRAP

In a survival situation, every little bit of food you can procure adds to your chances of staying alive. If you’re in an area with fish, one of these small pop bottle funnel traps can be a great way to catch small minnows for either bait, or food if conditions are really bad.
I’ve been using these types of minnow traps for as long as I can remember. They are a great way to catch bait, and are supper simple to make. They’re also pretty much free, and a great way to recycle those old water bottles.
plasticbottleinstructions

HOW TO MAKE THE PLASTIC BOTTLE FISH TRAP

  • With a Sharp Knife, carefully cut off the top of the pop bottle (as shown above). You can use pretty much any kind of plastic water bottle to make this type of trap.
  • Shove the head or cone of the bottle into the body of the bottle. To further secure the head, you can poke a couple holes through the cone and use a bit of fishing line to tie the sections together.
  • Throw in a couple small rocks to anchor the bottle to the bottom, poke a couple small holes in the bottle, and then add some small scraps of bait or small insects to attract the fish.
  • Place the bottle in some shallow water, and secure it with some line. Once the fish swim through the funnel, they will not be able to swim back out.
  • The more of these you can set, the better chances you have of catching something substantial enough to sustain you.

 EXAMPLES OF PLASTIC BOTTLE FISHING TRAPS


plasticbottlefishtrap
fishtrap

Sunday, May 31, 2015

HOW TO USE A FIRESTEEL

Ferrocerium Rods have earned quite a top level place in outdoor ventures. They bring nothing but advantages when carried and used in combination with natural materials for firelighting. They are very small, last for thousands of strikes and they produce very hot sparks at temperatures around 3,000 °F, which is clearly a great advantage no matter what the tinder. Despite how versatile and reliable these tools are they do require good technique and an understanding of the natural tinders your using. Identifying and preparation of natural materials to use with your Ferrocerium Rods is required always.
Some key things to know
Other names for a Ferrocerium Rod is Firesteel, Ferro Rod and Metal Match.
Ferrocerium is a combination of metals that have pyrophoric property’s. This means that they spontaneously ignite in trace amounts when exposed to oxygen or even moisture. Scraping the rod creates heat from friction and releases small fragments of metal which burst into flames at an incredibly high temperature. Its important to note that Ferrocerium Rods come in different composites, Iron Oxide levels can differ and a lower amount will give characteristics of being soft and brittle while a higher Iron Oxide level with harden the Ferrocerium Rod more.
You will find that Ferrocerium Rods will behave differently depending on the hardness. Softer ones will require less pressure and speed to create fragments and sparks but will wear out quicker. harder Ferrocerium Rods will require a little more pressure to get those bigger chunks off for long burn times. Also if you scrape them slowly they often do not produce sparks which can bring its advantages allowing you to create a pile of dust prior to setting the whole thing on fire with the final strike! This is good for stubborn tinders or lighting candles.
Personally I prefer a softer Ferrocerium Rod as more control can be applied.

IMG_0197
Some come attached to a large block of magnesium designed to be scraped and used with the Ferro Rod. I would avoid these as your better off with a larger Ferro Rod and no magnesium block.
A good one to buy commercially is the ‘Light My Fire Army 2.0‘ Ferro Rod as it has a good metal composite and will produce good sparks. It also comes with a small striker that has a good bevel on it so it will bite in and scrape away enough material. This particular Rod is of a softer composite and many techniques can be applied to it giving excellent control.
Ferro Rods normally come with a black coating so scrape some of it away till you see the metal underneath before using it. The scraper that you use will ultimately affect how it performs. If you scrape the rod with a smooth object nothing will happen because you’re not scraping away any of the material. Most Ferro Rod’s come with a small scraper and they will generally have a 90 degree sharp angle on them or a lip which will allow you to drag them at a 45 degree angle cutting into the rod creating friction and release a shower of sparks. If the spine of your knife has a sharp 90 degree angle on it you can use it to scrape the rod also.
The more you use a Ferro Rod and the more you practice with various materials the easier it will all become, many strikes become one or two before you have success. Once you start using them it wont be long before your buying Blank Rods from eBay and mounting them in antler, bone or wood to make your own.

Wednesday, May 27, 2015

OneTigris on The Bushcraft Show UK in 2015

OneTigris on The Bushcraft Show UK in 2015


OneTigris 34L Moudular Fast Tactical Assault Backpack DayPack for EDC Camping Hiking Traveling


OneTigris 34L Moudular Fast Tactical Assault Backpack DayPack for EDC Camping Hiking Traveling Specification:
  • The pack offers a great amount of carrying space and is perfect for military as well as camping and hiking
  • The modular molle system throughout the bag and shoulder strap to add on additional pouches & other tactical gear
  • Made with adjustable padded straps, waist belt and padded back for max comfort
  • Side pockets for quick access; have a partition for the water bag; external side compression straps
  • Overall Size: 11.8in * 7.9in * 19.7in. Approx 34L (Only the backpack is included)


OneTigris 34L Moudular Fast Tactical Assault Backpack DayPack for EDC Camping Hiking Traveling YouTube


Buy OneTigris 34L Moudular Fast Tactical Assault Backpack DayPack for EDC Camping Hiking Traveling  http://amzn.to/1RjeVPC

Monday, May 25, 2015

How to Make a Paracord Bracelet: Blaze Bar Quick Deploy


how-to-make-a-paracord-bracelet
When you are in a survival situation, every second counts. This blaze bar paracord bracelet is designed to quickly deploy. How quick you ask? Under 20 seconds!
Follow this tutorial to make your very own blaze bar, quick deploy paracord bracelet and be at ease knowing you’re a little more ready for an emergency situation.

Wait – Not the one you were looking for?

Check out our awesome list of paracord bracelets here

How to make a paracord bracelet:

Blaze bar, quick deploy paracord survival bracelet:

Supplies you need:

  • 13 ft of 550 Paracord (makes 8.5″ bracelet)
  • 1/2 in side release buckle
  • scissors
  • lighter or matches
how-to-make-a-paracord-bracelet
Supplies for the Blaze Bar Quick Deploy Paracord Bracelet


Step 1:

To get started, attach your paracord to one side of your buckle:
how-to-tie-a-paracord-bracelet
Fold your piece in half and thread it through the buckle.
paracord-bracelet-instructions
Pull the ends through the loop you made and pull tight.
starting-a-paracord-bracelet
When you start your bracelet, it should look like this.

Step 2:

Attach the other buckle and size it to your wrist:
paracord-braclelet-how-to
Thread the loose ends through the second buckle piece.
diy-paracord-bracelet
Pull the buckle up along the cord until you are at your desired bracelet length.
paracord-bracelet-step-by-step-instructions
Loop the ends back up towards the first buckle.


Step 3:

Start weaving your bracelet:
how-to-begin-paracord-bracelets
Hold the ends so the left free strand is on the left side of the buckle and the right strand is on the right side.
weaving-a-paracord-bracelet
Take the left strand around the front and loop it around all the pieces of paracord.
paracord-braclet
Pull it back to the left side.


Step 4:

Start with the strand on the left that is free hanging:
how-to-make-a-paracord-braclet
Starting with the left piece, thread it over the left core section.
paracord-bracelet-tutorial
Take it under the right core section.
paracord-bracelet-how-to
Over the right free strand.
paracord-bracelet-diy
Now, take the right free strand. Keeping it under the left free strand – pull it over the right core section.
make-paracord-bracelets
Underneath the left core section and up through the loop created by your left strand.
paracord-bracelet-tutorial
Pull to tighten.


Step 5:

Now, start the second section with the free strand on the right:
quick-deploy-paracord-bracelet
Now, starting with the right free strand – Pull it under the right core section.
how-to-tie-a-paracord-bracelet
Over the the left core section.
how-to-tie-paracord-bracelets
Underneath the left free strand.
Paracord Bracelet
Now, grabbing the left strand, pull it under the left core piece.
making-paracord-bracelets
Over the right core piece.
homemade-paracord-bracelet
Up, through the loop created by the right strand.
homemade-paracord-bracelets
Push the weave up.
paracord-bracelet-patterns
Pull the free strands in opposite directions to tighten.

Step 6:

Repeat step 4, starting with the left strand. Here’s a quick recap:
blaze-bar-paracord-bracelet
Left strand over and under.
quick-deploy-paracord-bracelet
Pull the right strand under the left.
how-to-make-paracord-stuff
Pull the right strand over the right core, under the left and up and through the left loop.
paracord-bracelet-designs
Tighten.

Step 7:

Repeat step 5, starting with the right strand. Here’s another quick recap:
paracord-bracelet-steps
Pull the right strand under the right core and over the left core piece.
paracord-bracelet-weave
Pull the left strand over the right strand, under the left core piece, over the right core piece and through the loop.
make-a-paracord-bracelet
Tighten and repeat.

Step 8:

Continue to repeat steps 4 and 5 until you’ve reached the second buckle. Finish up by trimming the ends and sealing them with your lighter or matches.
paracord-bracelet-projects
Cut off the ends and use your lighter or matches to burn them.

Saturday, May 23, 2015

OneTigris Tactical Dog Training Molle Vest Harness

OneTigris Tactical Dog Training Molle Vest Harness Specification:

  • MOLLE on both side of the harness for use of any MOLLE or MALICE-type pouches, attached with magazine pouches, water bottles, food snacks, etc
  • Velcro panel down the back for any patch furniture
  • Grid design lining for breathability. Soft pad insert on the collar to prevent chafing on your dog's neck
  • Two carry handles are attached to both the front and back of the harness and has two attachment points for a leash
  • 5 Size available, fit dog's Shoulder to back leg lengths 28.5cm to 54cm


OneTigris Tactical Dog Training Molle Vest Harness Reviews:

Does your wife make you walk a dog that is the size of a glorified hamster? Does your dog constantly get picked on and beat up at the dog park? Or is your dog a 150 pound wolf you rescued as a pup from the wild after fighting off hordes of lawless poachers? Whatever dog you own, look no further for an absolute necessity to your K9's load-out!

What you are looking at here is an excellent deal on a Tactical dog vest to make your K9 partner just as awesome as you are for searching out tactical gear. Whether your K9 partner is a professional bomb sniffing dog or you just want your dog to be "da bomb" at the local dog park, then this vest is for you! Not only do you have a wide selection of colors to blend with environment and coat patterns, you have a plethora of sizing options to fit the smallest or breeds up to the largest of wolf-hybrids out there! Make sure to measure your dog well though, as I bought a size medium for my 38 pound lion-taming wolf thinking it would be a bit large, and it ended up fitting perfect. Buyer beware though, this vest has the ability to turn even the daintiest of teacup poodles into combat ready, pitbull-killing, wolfpack of one because the world cannot handle two, best K9 partner you ever had! If you think you can handle that, then read on. Otherwise, turn back now and resume searching out Martha Stewart dog costumes.

Now lets talk about construction. Is it made in America? Sadly no. Was it forged in Middle Earth deep in the fires of Mount Doom? Maybe... That is just how tough this puppy is (no pun intended). The chassis starts on a heavy duty nylon with a breathable mesh sewn underneath to keep your K9 cool when combat gets heated. Next you have PALS (Pouch Attachment Ladder System) sewn down the entire length of both sides. This gives you the ability to load down your beast with all sorts of necessities such as water pouches, spare magazines for your primary and secondary weapons, kibble for those overnight missions, hand grenades, med-kits, short wave radio, K9 cam to give HQ a visual of your AO, and so much more! Heck, you could probably attach a turret mounted UZI and have your trained squirrel ride your beast into battle! Next, on the middle of the vest are two heavy duty nylon grab handles, both forward and aft, for a handler to easily maneuver even the biggest of K9 breeds. Sewn in next to each of those grab handles are two hooks for leashing your beast in order to prevent any collateral damage when civilians are present. To finish off this awesome harness you have a wide heavy duty Velcro strip running the entire length of the vest to attach whatever patch furniture your little heart desires.

If you're still not convinced, think of it this way: If Rambo had a dog, his dog would have this vest!


OneTigris Tactical Dog Training Molle Vest Harness YouTube


Buy  OneTigris Tactical Dog Training Molle Vest Harness : http://www.amazon.com/OneTigris-Tactical-Training-Molle-Harness/product-reviews/B00PZWDMX0/

Thursday, May 21, 2015

7 SURVIVAL TIPS LEARNED FROM THE WALKING DEAD

7 SURVIVAL TIPS LEARNED FROM THE WALKING DEAD

the-walking-dead-season-5-date-710x400-can-you-spot-the-difference-between-the-walking-dead-season-5b-postersThe Walking Dead is one of the most popular post-apocalyptic shows ever seen on television, and while the gripping story focuses on the characters and their travels through the ruined world, there are some lessons to be learned by us along the way.
Sure, not everything the characters do is spot-on correct for survival, and honestly much of what they do is the opposite of what you should do in a survival situation, but even bad actions can be learned from, just never repeated. We’ve rounded up seven lessons to be learned for survival from watching the Walking Dead and listed them below. The show does a great job at showing us what average people will do in an EOTWAWKI situation, and thanks to their many mistakes, we can learn and be better.


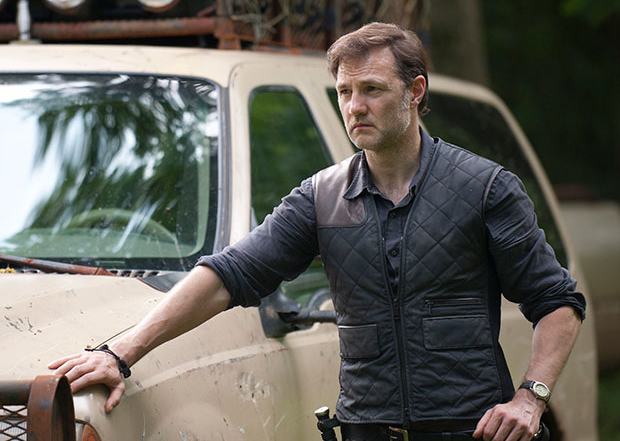
The_Governor_ep_3
1. BEWARE OF OTHER SURVIVORS, NO MATTER HOW NICE THEY SEEM

If there’s one thing this show has taught us, it’s that you need to be just as scared of your fellow survivors as you are the enemy. While someone might seem nice, they could easily be playing you for a chump so they can steal your supplies or just so they can do you harm.
The Governor seemed like a really nice guy and we saw how that turned out. The same goes for countless others in the show that lead people on just to take advantage of them later. Don’t even get us started on the “people” at Terminus. Remember, if it looks too good to be true, it probably is.

2. A SECURE LOCATION IS GREAT, BUT NEVER PERFECT

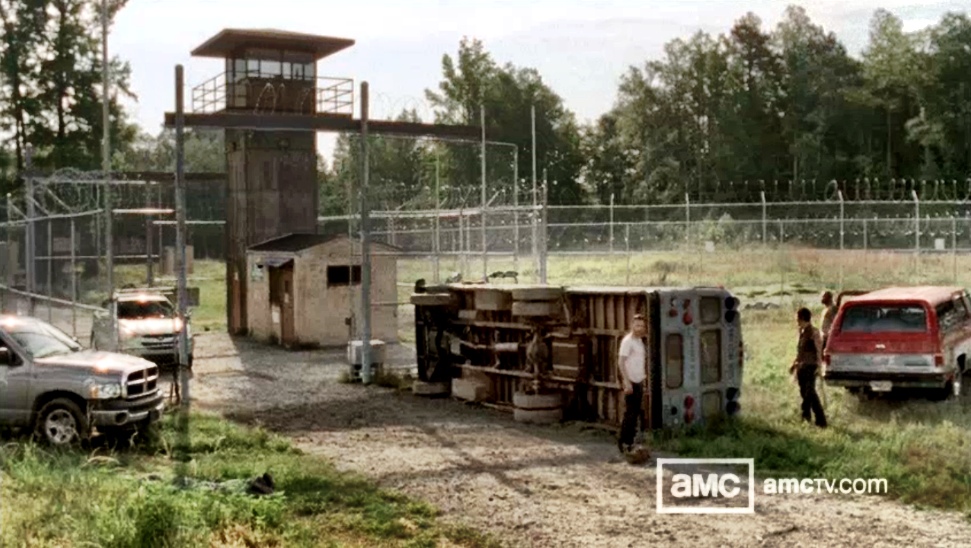
photo
This is best shown with the example of the jail in seasons 3 and 4, but can be applied to just about any refuge taken in the show. It doesn’t matter how secure you think your location is, something can always happen to make you have to bug out.
Keep your eyes open and no matter how safe you feel, always have a plan to get out quickly and to meet up after you bug out. As we saw in season 4 when the survivors were pushed from the prison, not having a plan to meet up after an emergency can leave your fellow survivors scattered to the wind and in constant danger.

3. SOMEONE ALWAYS HAS A BIGGER GUN

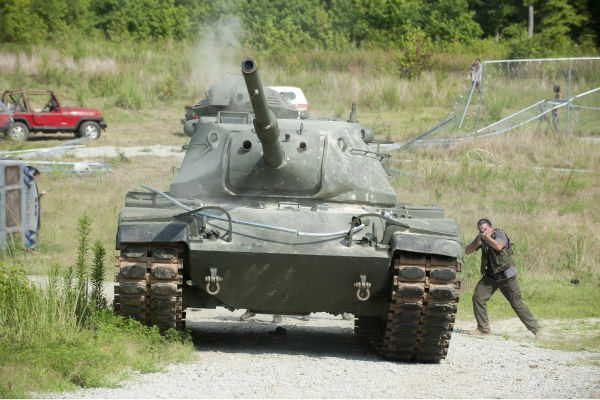
d7811fb0-e47b-1d96-fc5d-f86ce6e88816_TWD_408_GP_0802_0302
It doesn’t matter how big your gun is, or how many guns you have, there will always be someone out there with something bigger. Don’t rely on the size of your guns or the amount of ammo you have to protect yourself.
Learn how to survive and make sure you have other methods of defending your camp that aren’t guns. If you think you’ll be safe because you have the biggest guns, you’re destined to fall. Just look at The Governor and his tank for a great example.

4. BASIC SURVIVAL SKILLS WILL SAVE YOUR LIFE

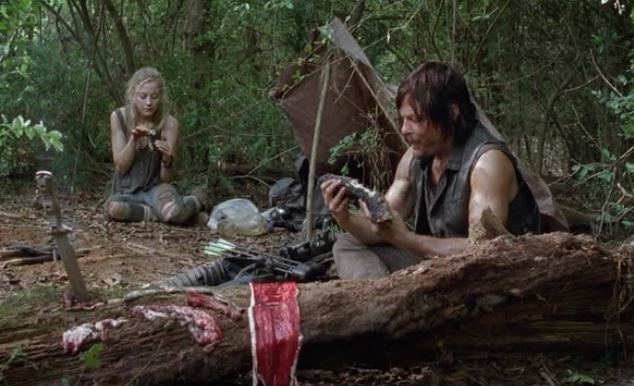
Daryl-and-Beth-Walking-Dead-4
When it’s all said and done, at the end of the day it’s basic survival skills that will keep you alive. All the guns and gadgets in the world won’t replace the basic skills like building a fire, tracking prey, and building snares. At the core of most episodes is the innate skills of the survivors.
Finding water, catching dinner, and setting up a safe camp are all core necessities to keep the survivors in the Walking Dead alive. Without these, they’d be zombie bait pretty quickly.

5. “ZOMBIES” ARE EVERYWHERE

walking-dead-set1-570x380
While the chances or real zombies being everywhere is pretty low, in a survival situation you’ll have to deal with a different sort of walking dead. While you might be prepared for most of what the world might throw at you when the SHTF, most people out there won’t have the slightest bit of preparation ready.
These people could be considered zombies, since they will be wondering around, ready to pounce on anyone who is prepared and take what they want. While you probably won’t find one that wants to munch on your brains, most of these real-life zombies will want to take everything you have.

6. LEARN WEAPONS OTHER THAN GUNS

Walking-dead-michonne_510
Guns are pretty useful tools. While you’d rather not think about having to use one against another person, especially when a major disaster may have wiped many people out already, sometimes it’s a necessary evil. If things have gotten so bad that there isn’t any real law enforcement, your gun might be the only thing standing between survival and death.
This doesn’t mean it will be useful forever. Ammo manufacturers are not likely to be pumping out rounds to buy at your local gun shop in a major survival situation, and finding a gunsmith to fix a majorly broken firearm will be nearly impossible.
Learn how to use and fight with weapons that aren’t guns. This includes knives, bows, and heck, even a samurai sword if that’s your thing. Don’t just carry these, learn how to use them and use them well. You’ll be glad you did when things go bad.

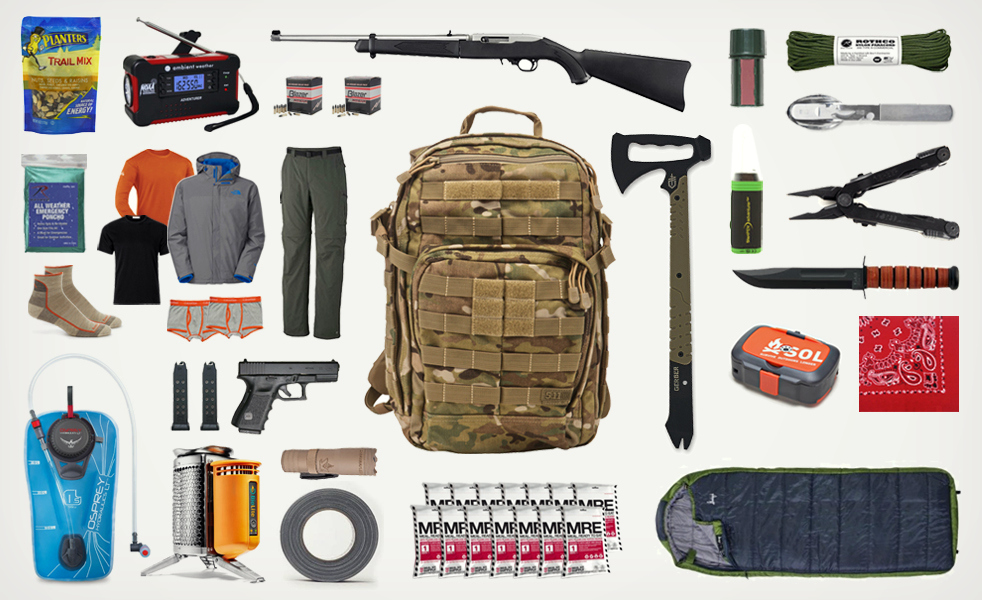
7. ALWAYS HAVE YOUR BUG OUT BAG READY

bugout-bag-cover
The last tip is very much a summary of all the tips above. The basic idea here is that you never know when things will go bad. It doesn’t matter if you’re behind walls of wire and cement, it doesn’t matter if you have a cache of rifles and handguns, and it doesn’t matter if you have the best-trained group out there. Things can go bad quickly and easily get away from you.
Always keep your bug out bag handy with all the supplies you need to get out of dodge quickly. Whether it’s a tank rolling over the fences surrounding your compound, or some “zombies” overtaking your camp, being able to pick up and run at a moment’s notice is vital to your survival. Keep this in mind and you’ll be far more likely to escape the hordes and make it to another season.