Sunday, May 31, 2015

HOW TO USE A FIRESTEEL

Ferrocerium Rods have earned quite a top level place in outdoor ventures. They bring nothing but advantages when carried and used in combination with natural materials for firelighting. They are very small, last for thousands of strikes and they produce very hot sparks at temperatures around 3,000 °F, which is clearly a great advantage no matter what the tinder. Despite how versatile and reliable these tools are they do require good technique and an understanding of the natural tinders your using. Identifying and preparation of natural materials to use with your Ferrocerium Rods is required always.
Some key things to know
Other names for a Ferrocerium Rod is Firesteel, Ferro Rod and Metal Match.
Ferrocerium is a combination of metals that have pyrophoric property’s. This means that they spontaneously ignite in trace amounts when exposed to oxygen or even moisture. Scraping the rod creates heat from friction and releases small fragments of metal which burst into flames at an incredibly high temperature. Its important to note that Ferrocerium Rods come in different composites, Iron Oxide levels can differ and a lower amount will give characteristics of being soft and brittle while a higher Iron Oxide level with harden the Ferrocerium Rod more.
You will find that Ferrocerium Rods will behave differently depending on the hardness. Softer ones will require less pressure and speed to create fragments and sparks but will wear out quicker. harder Ferrocerium Rods will require a little more pressure to get those bigger chunks off for long burn times. Also if you scrape them slowly they often do not produce sparks which can bring its advantages allowing you to create a pile of dust prior to setting the whole thing on fire with the final strike! This is good for stubborn tinders or lighting candles.
Personally I prefer a softer Ferrocerium Rod as more control can be applied.

IMG_0197
Some come attached to a large block of magnesium designed to be scraped and used with the Ferro Rod. I would avoid these as your better off with a larger Ferro Rod and no magnesium block.
A good one to buy commercially is the ‘Light My Fire Army 2.0‘ Ferro Rod as it has a good metal composite and will produce good sparks. It also comes with a small striker that has a good bevel on it so it will bite in and scrape away enough material. This particular Rod is of a softer composite and many techniques can be applied to it giving excellent control.
Ferro Rods normally come with a black coating so scrape some of it away till you see the metal underneath before using it. The scraper that you use will ultimately affect how it performs. If you scrape the rod with a smooth object nothing will happen because you’re not scraping away any of the material. Most Ferro Rod’s come with a small scraper and they will generally have a 90 degree sharp angle on them or a lip which will allow you to drag them at a 45 degree angle cutting into the rod creating friction and release a shower of sparks. If the spine of your knife has a sharp 90 degree angle on it you can use it to scrape the rod also.
The more you use a Ferro Rod and the more you practice with various materials the easier it will all become, many strikes become one or two before you have success. Once you start using them it wont be long before your buying Blank Rods from eBay and mounting them in antler, bone or wood to make your own.

Wednesday, May 27, 2015

OneTigris on The Bushcraft Show UK in 2015

OneTigris on The Bushcraft Show UK in 2015


OneTigris 34L Moudular Fast Tactical Assault Backpack DayPack for EDC Camping Hiking Traveling


OneTigris 34L Moudular Fast Tactical Assault Backpack DayPack for EDC Camping Hiking Traveling Specification:
  • The pack offers a great amount of carrying space and is perfect for military as well as camping and hiking
  • The modular molle system throughout the bag and shoulder strap to add on additional pouches & other tactical gear
  • Made with adjustable padded straps, waist belt and padded back for max comfort
  • Side pockets for quick access; have a partition for the water bag; external side compression straps
  • Overall Size: 11.8in * 7.9in * 19.7in. Approx 34L (Only the backpack is included)


OneTigris 34L Moudular Fast Tactical Assault Backpack DayPack for EDC Camping Hiking Traveling YouTube


Buy OneTigris 34L Moudular Fast Tactical Assault Backpack DayPack for EDC Camping Hiking Traveling  http://amzn.to/1RjeVPC

Monday, May 25, 2015

How to Make a Paracord Bracelet: Blaze Bar Quick Deploy


how-to-make-a-paracord-bracelet
When you are in a survival situation, every second counts. This blaze bar paracord bracelet is designed to quickly deploy. How quick you ask? Under 20 seconds!
Follow this tutorial to make your very own blaze bar, quick deploy paracord bracelet and be at ease knowing you’re a little more ready for an emergency situation.

Wait – Not the one you were looking for?

Check out our awesome list of paracord bracelets here

How to make a paracord bracelet:

Blaze bar, quick deploy paracord survival bracelet:

Supplies you need:

  • 13 ft of 550 Paracord (makes 8.5″ bracelet)
  • 1/2 in side release buckle
  • scissors
  • lighter or matches
how-to-make-a-paracord-bracelet
Supplies for the Blaze Bar Quick Deploy Paracord Bracelet


Step 1:

To get started, attach your paracord to one side of your buckle:
how-to-tie-a-paracord-bracelet
Fold your piece in half and thread it through the buckle.
paracord-bracelet-instructions
Pull the ends through the loop you made and pull tight.
starting-a-paracord-bracelet
When you start your bracelet, it should look like this.

Step 2:

Attach the other buckle and size it to your wrist:
paracord-braclelet-how-to
Thread the loose ends through the second buckle piece.
diy-paracord-bracelet
Pull the buckle up along the cord until you are at your desired bracelet length.
paracord-bracelet-step-by-step-instructions
Loop the ends back up towards the first buckle.


Step 3:

Start weaving your bracelet:
how-to-begin-paracord-bracelets
Hold the ends so the left free strand is on the left side of the buckle and the right strand is on the right side.
weaving-a-paracord-bracelet
Take the left strand around the front and loop it around all the pieces of paracord.
paracord-braclet
Pull it back to the left side.


Step 4:

Start with the strand on the left that is free hanging:
how-to-make-a-paracord-braclet
Starting with the left piece, thread it over the left core section.
paracord-bracelet-tutorial
Take it under the right core section.
paracord-bracelet-how-to
Over the right free strand.
paracord-bracelet-diy
Now, take the right free strand. Keeping it under the left free strand – pull it over the right core section.
make-paracord-bracelets
Underneath the left core section and up through the loop created by your left strand.
paracord-bracelet-tutorial
Pull to tighten.


Step 5:

Now, start the second section with the free strand on the right:
quick-deploy-paracord-bracelet
Now, starting with the right free strand – Pull it under the right core section.
how-to-tie-a-paracord-bracelet
Over the the left core section.
how-to-tie-paracord-bracelets
Underneath the left free strand.
Paracord Bracelet
Now, grabbing the left strand, pull it under the left core piece.
making-paracord-bracelets
Over the right core piece.
homemade-paracord-bracelet
Up, through the loop created by the right strand.
homemade-paracord-bracelets
Push the weave up.
paracord-bracelet-patterns
Pull the free strands in opposite directions to tighten.

Step 6:

Repeat step 4, starting with the left strand. Here’s a quick recap:
blaze-bar-paracord-bracelet
Left strand over and under.
quick-deploy-paracord-bracelet
Pull the right strand under the left.
how-to-make-paracord-stuff
Pull the right strand over the right core, under the left and up and through the left loop.
paracord-bracelet-designs
Tighten.

Step 7:

Repeat step 5, starting with the right strand. Here’s another quick recap:
paracord-bracelet-steps
Pull the right strand under the right core and over the left core piece.
paracord-bracelet-weave
Pull the left strand over the right strand, under the left core piece, over the right core piece and through the loop.
make-a-paracord-bracelet
Tighten and repeat.

Step 8:

Continue to repeat steps 4 and 5 until you’ve reached the second buckle. Finish up by trimming the ends and sealing them with your lighter or matches.
paracord-bracelet-projects
Cut off the ends and use your lighter or matches to burn them.

Saturday, May 23, 2015

OneTigris Tactical Dog Training Molle Vest Harness

OneTigris Tactical Dog Training Molle Vest Harness Specification:

  • MOLLE on both side of the harness for use of any MOLLE or MALICE-type pouches, attached with magazine pouches, water bottles, food snacks, etc
  • Velcro panel down the back for any patch furniture
  • Grid design lining for breathability. Soft pad insert on the collar to prevent chafing on your dog's neck
  • Two carry handles are attached to both the front and back of the harness and has two attachment points for a leash
  • 5 Size available, fit dog's Shoulder to back leg lengths 28.5cm to 54cm


OneTigris Tactical Dog Training Molle Vest Harness Reviews:

Does your wife make you walk a dog that is the size of a glorified hamster? Does your dog constantly get picked on and beat up at the dog park? Or is your dog a 150 pound wolf you rescued as a pup from the wild after fighting off hordes of lawless poachers? Whatever dog you own, look no further for an absolute necessity to your K9's load-out!

What you are looking at here is an excellent deal on a Tactical dog vest to make your K9 partner just as awesome as you are for searching out tactical gear. Whether your K9 partner is a professional bomb sniffing dog or you just want your dog to be "da bomb" at the local dog park, then this vest is for you! Not only do you have a wide selection of colors to blend with environment and coat patterns, you have a plethora of sizing options to fit the smallest or breeds up to the largest of wolf-hybrids out there! Make sure to measure your dog well though, as I bought a size medium for my 38 pound lion-taming wolf thinking it would be a bit large, and it ended up fitting perfect. Buyer beware though, this vest has the ability to turn even the daintiest of teacup poodles into combat ready, pitbull-killing, wolfpack of one because the world cannot handle two, best K9 partner you ever had! If you think you can handle that, then read on. Otherwise, turn back now and resume searching out Martha Stewart dog costumes.

Now lets talk about construction. Is it made in America? Sadly no. Was it forged in Middle Earth deep in the fires of Mount Doom? Maybe... That is just how tough this puppy is (no pun intended). The chassis starts on a heavy duty nylon with a breathable mesh sewn underneath to keep your K9 cool when combat gets heated. Next you have PALS (Pouch Attachment Ladder System) sewn down the entire length of both sides. This gives you the ability to load down your beast with all sorts of necessities such as water pouches, spare magazines for your primary and secondary weapons, kibble for those overnight missions, hand grenades, med-kits, short wave radio, K9 cam to give HQ a visual of your AO, and so much more! Heck, you could probably attach a turret mounted UZI and have your trained squirrel ride your beast into battle! Next, on the middle of the vest are two heavy duty nylon grab handles, both forward and aft, for a handler to easily maneuver even the biggest of K9 breeds. Sewn in next to each of those grab handles are two hooks for leashing your beast in order to prevent any collateral damage when civilians are present. To finish off this awesome harness you have a wide heavy duty Velcro strip running the entire length of the vest to attach whatever patch furniture your little heart desires.

If you're still not convinced, think of it this way: If Rambo had a dog, his dog would have this vest!


OneTigris Tactical Dog Training Molle Vest Harness YouTube


Buy  OneTigris Tactical Dog Training Molle Vest Harness : http://www.amazon.com/OneTigris-Tactical-Training-Molle-Harness/product-reviews/B00PZWDMX0/

Thursday, May 21, 2015

7 SURVIVAL TIPS LEARNED FROM THE WALKING DEAD

7 SURVIVAL TIPS LEARNED FROM THE WALKING DEAD

the-walking-dead-season-5-date-710x400-can-you-spot-the-difference-between-the-walking-dead-season-5b-postersThe Walking Dead is one of the most popular post-apocalyptic shows ever seen on television, and while the gripping story focuses on the characters and their travels through the ruined world, there are some lessons to be learned by us along the way.
Sure, not everything the characters do is spot-on correct for survival, and honestly much of what they do is the opposite of what you should do in a survival situation, but even bad actions can be learned from, just never repeated. We’ve rounded up seven lessons to be learned for survival from watching the Walking Dead and listed them below. The show does a great job at showing us what average people will do in an EOTWAWKI situation, and thanks to their many mistakes, we can learn and be better.


The_Governor_ep_3
1. BEWARE OF OTHER SURVIVORS, NO MATTER HOW NICE THEY SEEM

If there’s one thing this show has taught us, it’s that you need to be just as scared of your fellow survivors as you are the enemy. While someone might seem nice, they could easily be playing you for a chump so they can steal your supplies or just so they can do you harm.
The Governor seemed like a really nice guy and we saw how that turned out. The same goes for countless others in the show that lead people on just to take advantage of them later. Don’t even get us started on the “people” at Terminus. Remember, if it looks too good to be true, it probably is.

2. A SECURE LOCATION IS GREAT, BUT NEVER PERFECT

photo
This is best shown with the example of the jail in seasons 3 and 4, but can be applied to just about any refuge taken in the show. It doesn’t matter how secure you think your location is, something can always happen to make you have to bug out.
Keep your eyes open and no matter how safe you feel, always have a plan to get out quickly and to meet up after you bug out. As we saw in season 4 when the survivors were pushed from the prison, not having a plan to meet up after an emergency can leave your fellow survivors scattered to the wind and in constant danger.

3. SOMEONE ALWAYS HAS A BIGGER GUN

d7811fb0-e47b-1d96-fc5d-f86ce6e88816_TWD_408_GP_0802_0302
It doesn’t matter how big your gun is, or how many guns you have, there will always be someone out there with something bigger. Don’t rely on the size of your guns or the amount of ammo you have to protect yourself.
Learn how to survive and make sure you have other methods of defending your camp that aren’t guns. If you think you’ll be safe because you have the biggest guns, you’re destined to fall. Just look at The Governor and his tank for a great example.

4. BASIC SURVIVAL SKILLS WILL SAVE YOUR LIFE

Daryl-and-Beth-Walking-Dead-4
When it’s all said and done, at the end of the day it’s basic survival skills that will keep you alive. All the guns and gadgets in the world won’t replace the basic skills like building a fire, tracking prey, and building snares. At the core of most episodes is the innate skills of the survivors.
Finding water, catching dinner, and setting up a safe camp are all core necessities to keep the survivors in the Walking Dead alive. Without these, they’d be zombie bait pretty quickly.

5. “ZOMBIES” ARE EVERYWHERE

walking-dead-set1-570x380
While the chances or real zombies being everywhere is pretty low, in a survival situation you’ll have to deal with a different sort of walking dead. While you might be prepared for most of what the world might throw at you when the SHTF, most people out there won’t have the slightest bit of preparation ready.
These people could be considered zombies, since they will be wondering around, ready to pounce on anyone who is prepared and take what they want. While you probably won’t find one that wants to munch on your brains, most of these real-life zombies will want to take everything you have.

6. LEARN WEAPONS OTHER THAN GUNS

Walking-dead-michonne_510
Guns are pretty useful tools. While you’d rather not think about having to use one against another person, especially when a major disaster may have wiped many people out already, sometimes it’s a necessary evil. If things have gotten so bad that there isn’t any real law enforcement, your gun might be the only thing standing between survival and death.
This doesn’t mean it will be useful forever. Ammo manufacturers are not likely to be pumping out rounds to buy at your local gun shop in a major survival situation, and finding a gunsmith to fix a majorly broken firearm will be nearly impossible.
Learn how to use and fight with weapons that aren’t guns. This includes knives, bows, and heck, even a samurai sword if that’s your thing. Don’t just carry these, learn how to use them and use them well. You’ll be glad you did when things go bad.

7. ALWAYS HAVE YOUR BUG OUT BAG READY

bugout-bag-cover
The last tip is very much a summary of all the tips above. The basic idea here is that you never know when things will go bad. It doesn’t matter if you’re behind walls of wire and cement, it doesn’t matter if you have a cache of rifles and handguns, and it doesn’t matter if you have the best-trained group out there. Things can go bad quickly and easily get away from you.
Always keep your bug out bag handy with all the supplies you need to get out of dodge quickly. Whether it’s a tank rolling over the fences surrounding your compound, or some “zombies” overtaking your camp, being able to pick up and run at a moment’s notice is vital to your survival. Keep this in mind and you’ll be far more likely to escape the hordes and make it to another season.

Wednesday, May 20, 2015

How Not to Die: 20 Survival Tips You Must Know

Accidents are the leading cause of death among U.S. men 18 to 50 years old, accounting for 37,000 of the roughly 148,000 annual fatalities. Some instances of unintentional death, to use the official term, are unavoidable—wrong place, wrong time—but most aren't. Staying alive requires recognizing danger, feeling fear, and reacting. "We interpret external cues through our subconscious fear centers very quickly," says Harvard University's David Ropeik, author of How Risky Is It, Really? Trouble is, even smart, sober, experienced men can fail to register signals of an imminent threat. Here we present 20 easy-to-miss risks, and how to avoid or survive them.


We Recommend
THESE RIDES WILL MAKE YOU A LONGBOARD BELIEVER
1.Outsmart Wildlife.
If you come face-to-face with a wild animal, the natural response is to bolt, but that can trigger the animal's predatory instinct. On July 6, 2011, Brian Matayoshi, 57, and his wife, Marylyn, 58, were hiking in Yellowstone National Park when they came upon a grizzly bear and fled, screaming. Brian was bitten and clawed to death; Marylyn, who had stopped and crouched behind a tree, was approached by the bear but left unharmed.

STAT: Each year three to five people are killed in North America in wild animal attacks, primarily by sharks and bears.

DO: Avoid shark-infested waters, unless you are Andy Casagrande. As for bears, always carry repellent pepper spray when hiking; it can stop a charging bear from as much as 30 feet away. To reduce the risk of an attack, give bears a chance to get out of your way. "Try to stay in the open," says Larry Aumiller, manager of Alaska's McNeil River State Game Sanctuary. "If you have to move through thick brush, make noise by clapping and shouting."

2. Don't Mess with Vending Machines.
You skipped lunch. You need a snack. You insert money into a vending machine, press the buttons, and nothing comes out. You get mad.

STAT: Vending machines caused 37 deaths between 1978 and 1995, crushing customers who rocked and toppled the dispensers. No recent stats exist, but the machines are still a danger.

DON'T: Skip lunch.

3. Stay on the Dock.
On May 20, 2013, Kyle McGonigle was on a dock on Kentucky's Rough River Lake. A dog swimming nearby yelped, and McGonigle, 36, saw that it was struggling to stay above water. He dove in to save the dog, but both he and the animal drowned, victims of electric-shock drowning (ESD). Cords plugged into an outlet on the dock had slipped into the water and electrified it.

STAT: The number of annual deaths from ESD in the U.S. are unknown, since they are counted among all drownings. But anecdotal evidence shows that ESD is widespread. ESD prevention groups have successfully urged some states to enact safety standards, including the installation of ground-fault circuit interrupters and a central shutoff for a dock's electrical system.

DON'T: Swim within 100 yards of any wired dock. But do check whether docks follow safety standards.

4. Keep It on the Dirt.
On the morning of July 14, 2013, Taylor Fails, 20, turned left in his 2004 Yamaha Rhino ATV at a paved intersection near his Las Vegas–area home. The high-traction tire treads gripped the road and the vehicle flipped, ejecting Fails and a 22-year-old passenger. Fails died at the scene; the passenger sustained minor injuries.

STAT: One-third of fatal ATV accidents take place on paved roads; more than 300 people died in on-road ATV wrecks in 2011.

DO: Ride only off-road. Paul Vitrano, executive vice president of the ATV Safety Institute, says, "Soft, knobby tires are designed for traction on uneven ground and will behave unpredictably on pavement." In some cases, tires will grip enough to cause an ATV to flip, as in the recent Nevada incident. "If you must cross a paved road to continue on an approved trail, go straight across in first gear."

5. Mow on the Level.
Whirring blades are the obvious hazard. But most lawnmower-related deaths result from riding mowers flipping over on a slope and crushing the drivers.

STAT: About 95 Americans are killed by riding mowers each year.

DO: Mow up and down a slope, not sideways along it. How steep is too steep? "If you can't back up a slope, do not mow on it," Carl Purvis of the U.S. Consumer Product Safety Commission advises.

6. Beware Low-Head Dams.

Advertisement - Continue Reading Below

SHARE
TWEET
PIN
MOST READ


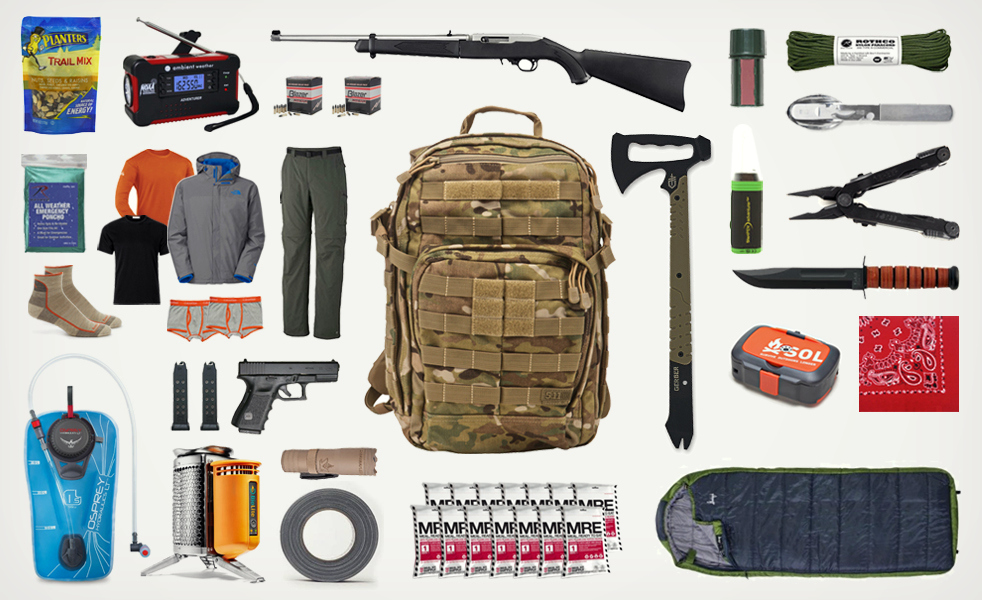
The Non-Paranoid Man's Guide to Preparing for Disa…

Nick Meyers, Survival Expert

10 Things an Avalanche Rescuer Always Carries

I Ate Dehydrated Food for a Week
Found on small or moderate-size streams and rivers, low-head dams are used to regulate water flow or prevent invasive species from swimming upstream. But watch out. "They're called drowning machines because they could not be designed better to drown people," says Kevin Colburn of American Whitewater, a nonprofit whitewater preservation group. To a boater heading downstream, the dams look like a single line of flat reflective water. But water rushing over the dam creates a spinning cylinder of water that can trap a capsized boater.

STAT: Eight to 12 people a year die in low-head and other dam-related whitewater accidents.


We Recommend
ALL THE GEAR YOU NEED THIS WINTER
DO: Curl up, drop to the bottom, and move downstream if caught in a hydraulic. "It's a counterintuitive thing to do, but the only outflow is at the bottom," Colburn says. Surface only after you've cleared the vortex near the dam.

7. Don't Hold your Breath.
If you want to take a long swim underwater, the trick is to breathe in and out a few times and take a big gulp of air before you submerge. Right? Dead wrong. Hyperventilating not only doesn't increase the oxygen in your blood, it also decreases the amount of CO2, the compound that informs the brain of the need to breathe. Without that natural signal, you may hold your breath until you pass out and drown. This is known as shallow-water blackout.

STAT: Drowning is the fifth largest cause of accidental death in the U.S., claiming about 10 lives a day. No one knows how many of these are due to shallow-water blackout, but its prevalence has led to the formation of advocacy groups, such as Shallow Water Blackout Prevention.

DON'T: Hyperventilate before swimming underwater, and don't push yourself to stay submerged as long as possible.

8. Keep your Footing.
One mistake is responsible for about half of all ladder accidents: carrying something while climbing.

STAT: More than 700 people die annually in falls from ladders and scaffolding.

DO: Keep three points of contact while climbing; use work-belt hooks, a rope and pulley, or other means to get items aloft.

9. Ford Carefully.
A shallow stream can pack a surprising amount of force, making fording extremely dangerous. Once you've been knocked off your feet, you can get dragged down by the weight of your gear, strike rocks in the water, or succumb to hypothermia.

STAT: Water-related deaths outnumber all other fatalities in U.S. national parks; no specific statistics are available for accidents while fording streams.

DO: Cross at a straight, wide section of water. Toss a stick into the current; if it moves faster than a walking pace, don't cross. Unhitch waist and sternum fasteners before crossing; a wet pack can pull you under.

10.Land Straight.
You have successfully negotiated free fall, deployed your canopy, and are about to touch down. Safe? Nope. Inexperienced solo jumpers trying to avoid an obstacle at the last minute, or experienced skydivers looking for a thrill, might sometimes pull a toggle and enter a low-hook turn. "If you make that turn too low, your parachute doesn't have time to level out," says Nancy Koreen of the United States Parachute Association. Instead, with your weight far out from the canopy, you'll swing down like a wrecking ball.

STAT: Last year in the U.S., low-hook turns caused five of the 19 skydiving fatalities.

DO: Scope out your landing spot well in advance (from 100 to 1000 feet up, depending on your skill) so you have room to land without needing to swerve.

Bartholomew Cooke
11. Stay Warm and Dry.
Cold is a deceptive menace—most fatal hypothermia cases occur when it isn't excessively cold, from 30 to 50 degrees Fahrenheit. Wet clothes compound the effect of the temperature.

STAT: Hypothermia kills almost 1000 people a year in the U.S.

DO: Wear synthetic or wool clothing, not moisture-trapping cotton. If stranded, conserve heat by stuffing your clothes or shelter with dry leaves.

12. Let Leaning Trees Stand.
The motorized blade isn't always the most dangerous thing about using a chain saw. Trees contain enormous amounts of energy that can release in ways both surprising and lethal. If a tree stands at an angle, it becomes top-heavy and transfers energy lower in the trunk. When sawed, it can shatter midcut and create a so-called barber chair. The fibers split vertically, and the rearward half pivots backward. "It's very violent and it's very quick," says Mark Chisholm, chief executive of New Jersey Arborists.

STAT: In 2012, 32 people died felling trees.

DON'T: Saw into any tree or limb that's under tension.

13. Dodge Line Drives.
America's national pastime may seem a gentle pursuit, but it is not without its fatal hazards. The 2008 book Death at the Ballpark: A Comprehensive Study of Game-Related Fatalities, 1862–2007 catalogs deaths that have occurred while people were playing, watching, or officiating at baseball games. Among the causes is commotio cordis, a concussion of the heart that leads to ventrical fibrillation when the chest is struck during a critical 10- to 30-millisecond moment between heartbeats. About 50 percent of all victims are athletes (and the vast majority of these are male) engaging in sports that also include ice hockey and lacrosse, the U.S. National Commotio Cordis Registry reports.

Advertisement - Continue Reading Below

SHARE
TWEET
PIN
MOST READ


How to Cook After the Fall of Civilization

6 Secrets an Alaskan Dog Musher Uses To Stay Alive

The Iconic Land Rover Defender Goes Out in Style

5 Things You Need to Help Your Shoes Survive the W…
STAT: The registry recorded 224 fatal cases from 1996 to 2010. Commotio cordis is the No. 1 killer in U.S. youth baseball, causing two to three deaths a year.

DON'T: Take a shot to the chest. Even evasive action and protective gear are not significant deterrents. Of note: Survival rates rose to 35 percent between 2000 and 2010, up from 15 percent in the previous decade, due mainly to the increased presence of defibrillators at sporting events.

14. Climb with Care.
Accidental shootings are an obvious hazard of hunting, but guess what's just as bad: trees. "A tree stand hung 20 feet in the air should be treated like a loaded gun, because it is every bit as dangerous," says Marilyn Bentz, executive director of the National Bow hunter Educational Foundation. Most tree-stand accidents occur while a hunter is climbing, she says.


We Recommend
THE POPULAR MECHANICS BOOT SELECTOR
STAT: About 100 hunters a year die falling from trees in the U.S. and Canada, a number "equal to or exceeding firearm- related hunting deaths," Bentz says.

DO: Use a safety harness tethered to the tree when climbing, instead of relying on wooden boards nailed to the tree, which can give way suddenly.

15. Avoid Cliffing Out.
Hikers out for a scramble may end up on an uncomfortably steep patch and, finding it easier to climb up than down, keep ascending until they "cliff out," unable to go either forward or back. Spending a night freezing on a rock face waiting to be rescued is no fun, but the alternative is worse.

STAT: Falls are one of the top three causes of death in the wilderness, along with cardiac arrest and drowning. Cliffed-out hikers account for 11 percent of all search-and-rescue calls in Yosemite National Park.

DON'T: Take a shortcut you can't see the length of. If you realize you've lost your way, either backtrack or call for help. Gadgets such as DeLorme's inReach SE provide satellite communication to send a distress call from anywhere on the planet.

16. Don't Drink Too Much.
We all know that dehydration can be dangerous, leading to dizziness, seizures, and death, but drinking too much water can be just as bad. In 2002, 28-year-old runner Cynthia Lucero collapsed midway through the Boston Marathon. Rushed to a hospital, she fell into a coma and died. In the aftermath it emerged that she had drunk large amounts along the run. The excess liquid in her system induced a syndrome called exercise-associated hyponatremia (EAH), in which an imbalance in the body's sodium levels creates a dangerous swelling of the brain.

STAT: Up to one-third of endurance athletes who collapse during events suffer from EAH. Between 1989 and 1996, when the U.S. Army mandated heavy fluid intake during exercise in high heat, EAH caused at least six deaths.

DON'T: Drink more than 1.5 quarts per hour during sustained, intense exercise. But do consume plenty of salt along with your fluids.

17. Use Generators Safely.
After Hurricane Sandy, many homeowners used portable generators to replace lost power, leaving the machines running overnight and allowing odorless carbon monoxide to waft inside. The gas induces dizziness, headaches, and nausea in people who are awake, but "when people go to sleep with a generator running, there's no chance for them to realize that something's wrong," says Brett Brenner, president of the Electrical Safety Foundation International.

STAT: Carbon monoxide from consumer products, including portable generators, kills nearly 200 a year. Of the Sandy-related deaths, 12 were due to carbon monoxide poisoning.

DO: Keep generators more than 20 feet from a house.

18. Don't Slip–Slide Away.
Hikers on a glacier or in areas where patches of snow remain above the tree line may be tempted to speed downhill by sliding, or glissading. Bad idea: A gentle glide can easily lead to an unstoppable plummet. In 2005 climber Patrick Wang, 27, died on California's Mount Whitney while glissading off the summit; he slid 300 feet before falling off a 1000-foot cliff.

STAT: One or two people die each year while glissading.

DON'T: Glissade, period. But if you ever do it, you should be an expert mountaineer with well-practiced self-arrest techniques. Glissaders should always remove their crampons and know their line of descent.

19. Go with the Flow.

The tourist season got off to a grisly start this year in Gulf Shores, Ala. During a two-day period in early June, four men drowned after being caught in rip currents. The unusually strong currents were invisible, not even roiling the surface. Rip currents occur when water rushing back from the shoreline is channeled through a narrow gap between two sand bars, accelerating the outward flow.

STAT: More than 100 Americans drown in rip currents each year.

DO: Allow the current to carry you out beyond the riptide's flow, then swim laterally until you reach a position where you can turn and stroke safely to shore.

20. Beat the Heat.
A rock formation in Utah called The Wave is remote and beautiful, but also arid and sweltering. This past July a couple hiking the area were found dead after the afternoon heat overwhelmed them. Scarcely three weeks later, a 27-year-old woman collapsed while hiking The Wave with her husband and died before he could get help.

STAT: An average of 675 people die each year in the U.S. from heat-related complications.

DO: Carry lots of fluids, hike in the morning, and let people know where you're going when trekking in the desert.